
DIY: Princess Crown
I made this tutorial for the SWAP Team blog. It was a part of the surprise Christmas card we sent to our amazing volunteers.
The SWAP Team organizes clothes swaps all around Canada. We promote a sustainable life style while helping to renew wardrobes and save money! Want to join? Then sign up on this page. Sharing is good!
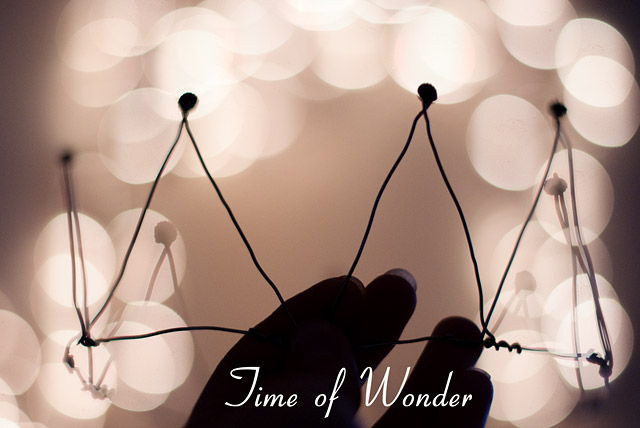
Want to look special this Christmas and stay on budget? Then my DIY tutorials is for you! I will show you how to make a fun and sassy accessory: A wire crown. It will bring out your inner princess and will attract attention in any party!
Originally I spotted this lovely DIY project in the Free People blog. I fell in love with the idea and decided to make a similar project with a few modifications.


Supplies You Need
- wire – I used the Artistic Wire 18 Ga
- wire cutters
- pliers
- an old bead necklace to decorate the points of the crown

Step By Step Instructions
First you make a wire circle that will be your crown base. It should be a little bit bigger than your head. Before cutting the wire, try the circle on your head to make sure it has a right size.
After cutting, wrap the ends tightly around the base using the pliers. Make sure the ends point away from your head: It will prevent them from scratching your skin.

Then, cut eight pieces of wire of about 21 cm of length. It will be the crown points.

Bend the wire pieces in the middle.

Decorate the points with some beads. Use the pliers to twist the tips of the points to fix the beads.
I wanted to use the big gray plastic “pearl” beads, but their holes were too small. The necklace had also smaller metal ones with bigger holes; there were precisely eight of them!

Bend the ends of the points to prepare them for attaching to the crown base. Try to not make the bent ends too small; otherwise, it will be difficult to do the next step.

Arrange the points symmetrically along the base. Begin with two in 180 degrees from each other.
Hook the ends under the base wire.
Using the pliers, wrap the ends around the base wire as tight as you can.
Then, place two other points in 90 degrees from the attached ones and repeat the steps.
After completing you should have four points evenly attached as show on the picture. Attach the other four in between.
Again, try to points the ends of the wire towards outside; it will prevent your head from scratches.

And here comes the crown!

Happy DIY-ing! Make this Christmas special!

Disclaimer: Yup, this post may contain affiliate links! If you buy something from me, I get some margarita money (not enough to buy a pair of shoes). Read more here.


Cool idea! Following you now. Would love a follow back here http://believeninspire.wordpress.com/