
Take That Trash and Make It Flash: Fringed Jacket DIY (With Handmade Fringe)
As I already wrote in my previous post, a fringe trend is making a comeback for Spring-Summer 2015 season, and we can see it in fashion magazines and on the streets of fashionable cities. So, I decided to make a fringe DIY! I got inspired by this cute fringed jacket:

Contents
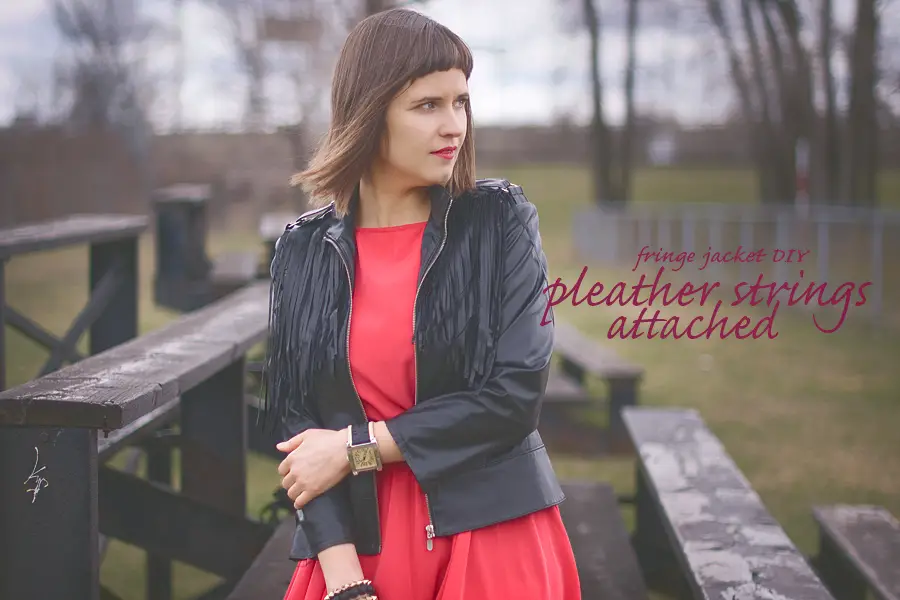
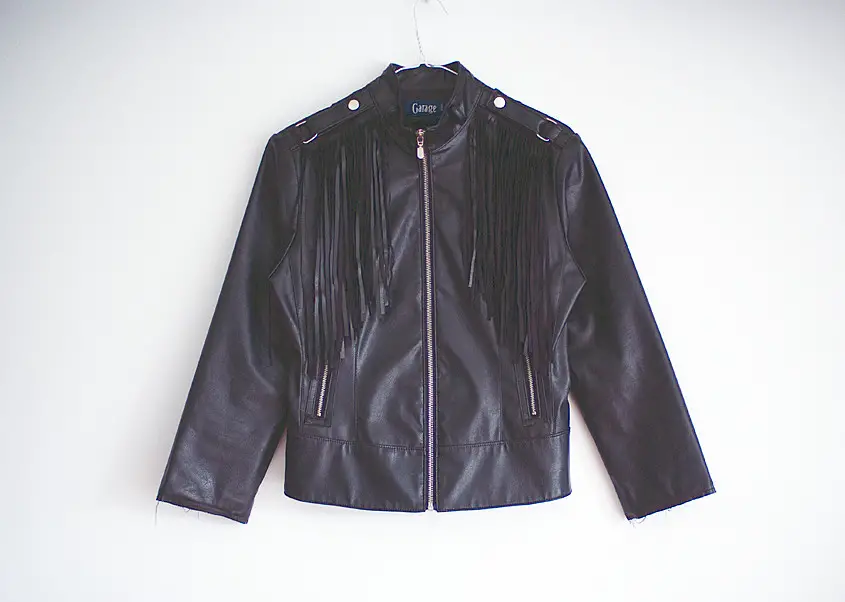
DIY Result
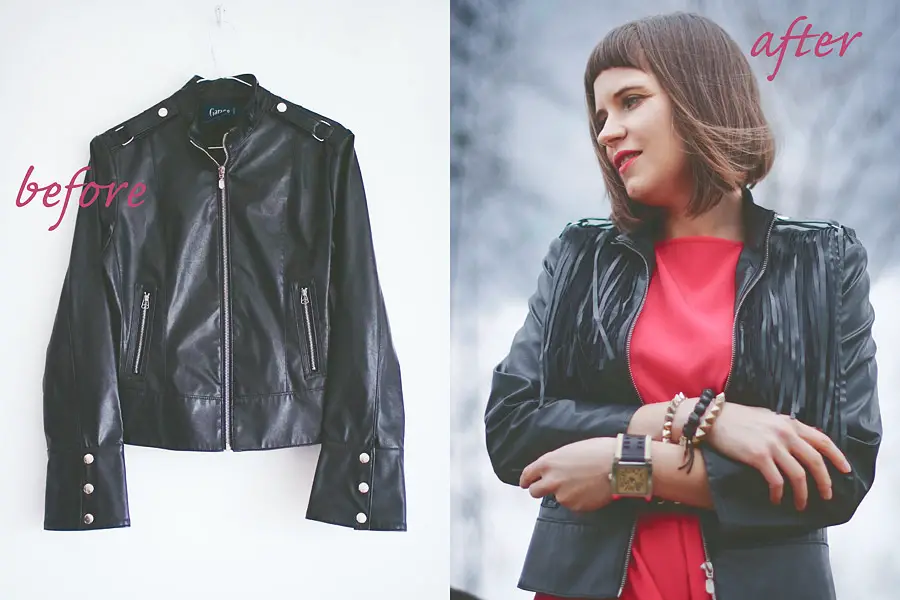
Here is my version. I think it turned out to be not so shabby! In fact I am quite proud of myself that I could convert a dull outdated jacket into something trendy using almost no additional materials. What do you think guys, do you agree? Tell me your opinion in the comments below!
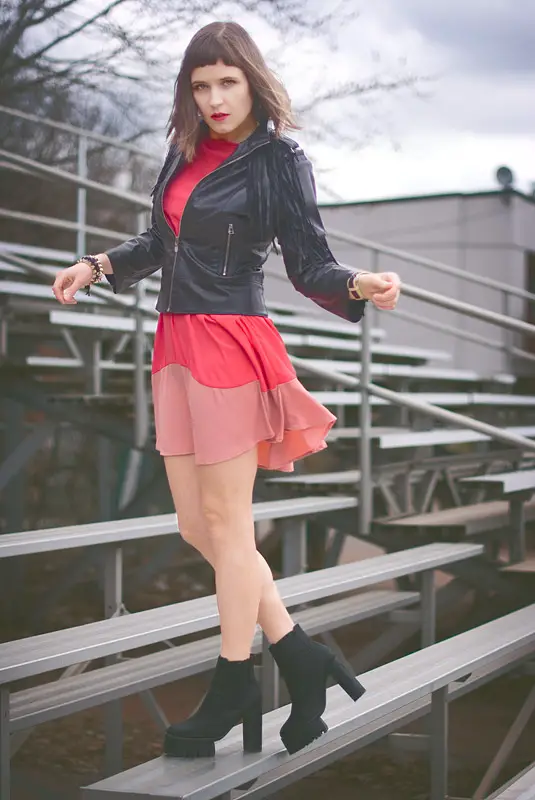
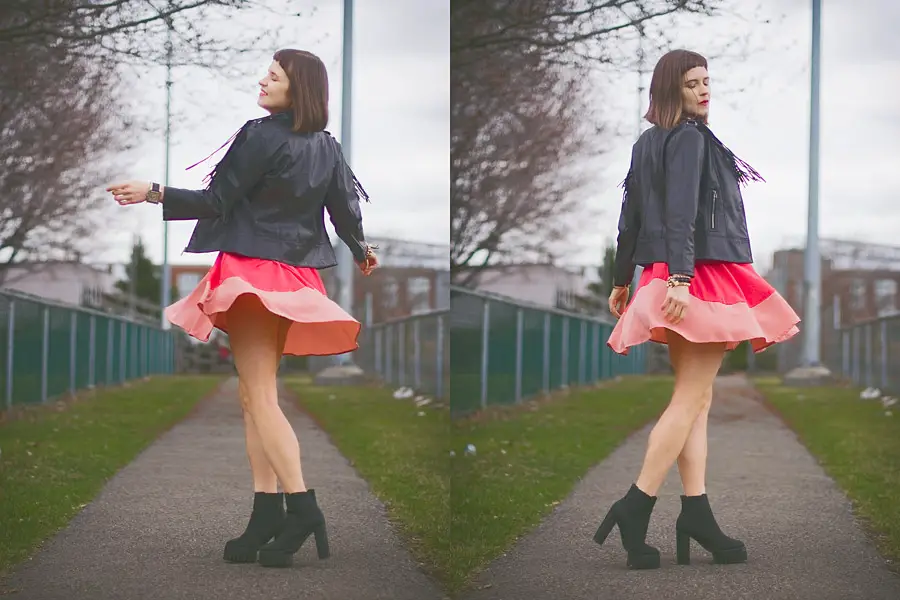
Spin, spin till you drop!

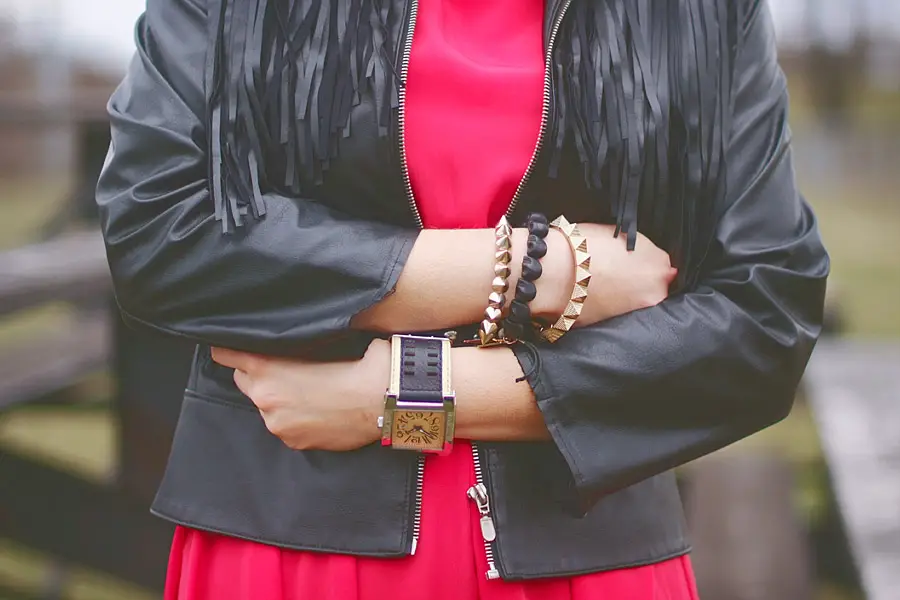
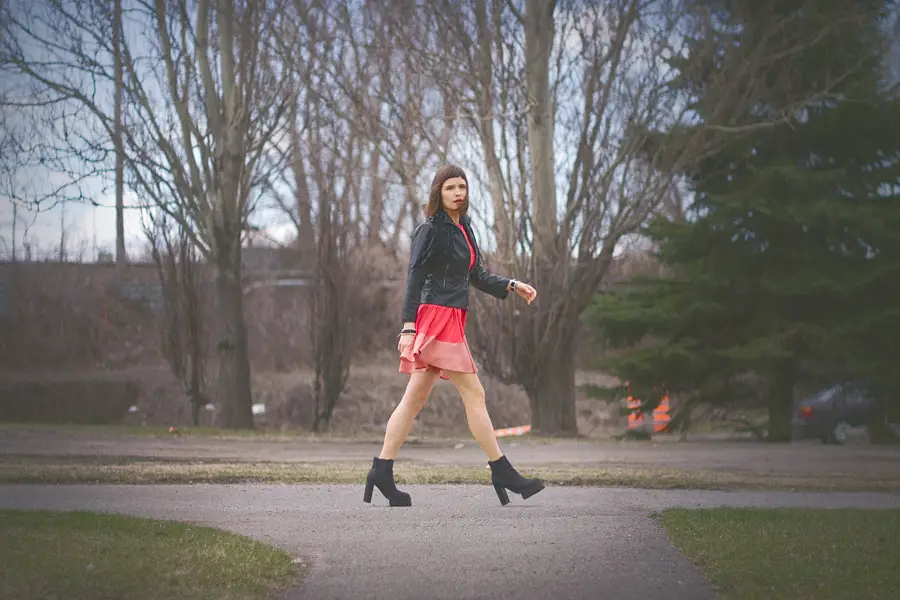
How to Get The Look
- Fringe jacket: upcycled second hand (similar, similar)
- Ankle booties: Jeffrey Campbell (similar, a cheaper alternative)
- Flippy dress: second hand (similar, similar)
How I Came Up With the DIY
This project was a bit of a gamble. Originally I wanted to use this jacket to make a fringe to decorate some other garment. I was ready to chop it into pieces, but then the jacket looked sadly into my eyes… with its puppy eyes… and I just couldn’t. I just couldn’t. The jacket was too nice to be cut. Ok, I said to myself, let’s be creative and try to upcycle it!
I bought the jacket a while ago at Salvation Army for $10. Do not ask me why. I wore it only once or twice, and what annoyed me the most was its big cuffs. The cuffs were so big and stiff like the ones on men’s costumes of 18th century. So out of fashion and so big… Big! Big enough to chop them into noodles and use it as a fringe! This is a brilliant idea!
But where to attach the fringe? My first thought was to make a few tassels and attach them to the zipper sliders on the pockets and fastener. But I did not have leather glue required to make tassels (and I did not want to wait until I buy some), also I thought it would look rather boring. How about attaching the fringe to the sleeves? Nah, it would again require leather glue, and I was not sure I would not be able to make fringe long enough (the cuffs were not that big hehe). Mmm… How about attaching the fringe to the shoulders? I could stitch it under the epaulettes (a fancy word for shoulder straps), so no glue would be needed and the fringe seam would be quite invisible. Yep, that’s a great an idea, let’s do that!
But before starting cutting the fringe I made a fringe mock-up out of dark denim and attached it to the shoulders using a double-sticky tape. It looked good enough, and the project got a green light to go.
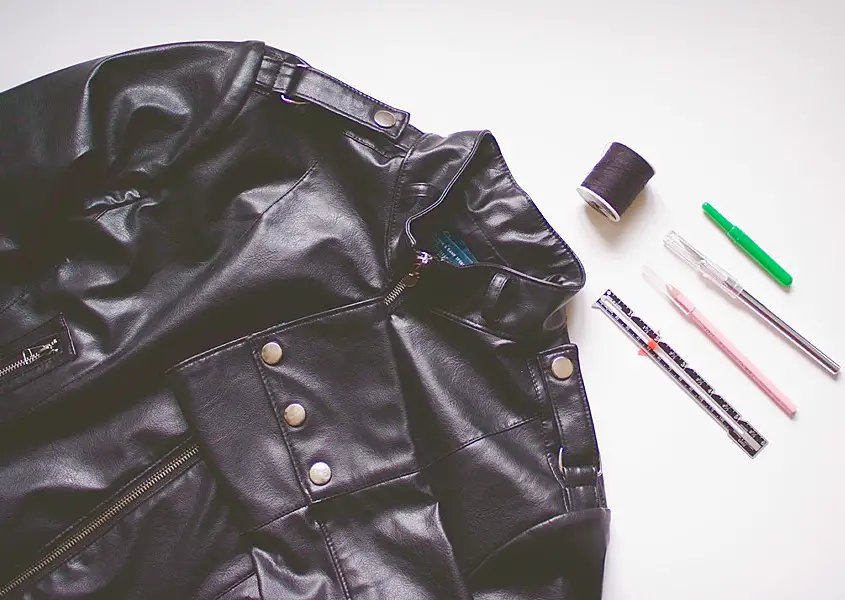
Supplies You Need For This DIY
- a faux leather jacket with wide cuffs
- thread and needle
- unpicker
- ruler
- fabric pencil
- Exacto knife
DIY cost (materials):
- a second-hand jacket from Salvation Army: $10
DIY Instructions
Remove cuffs using the unpicker.
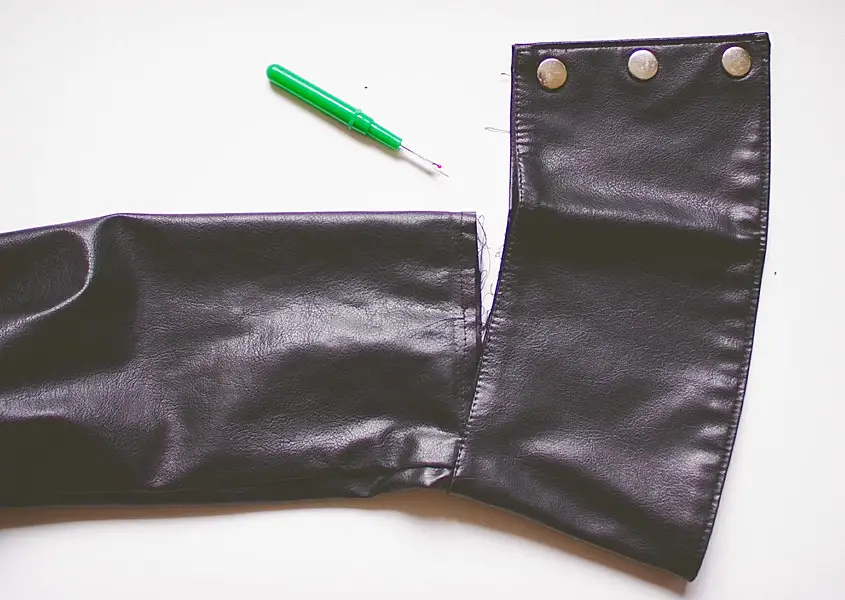
Cut off the fastener using the Exacto knife. I prefer to use an Exacto knife over scissors because it makes nice even cuts.
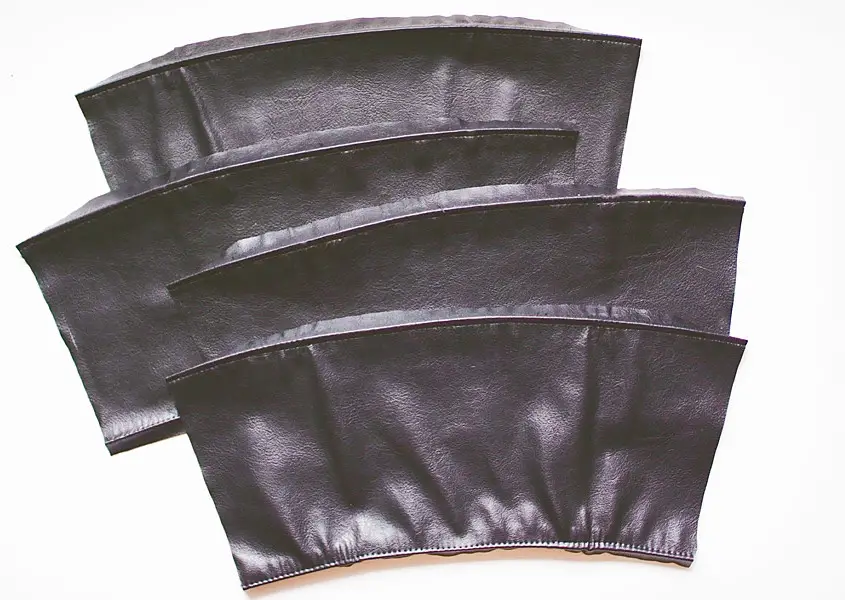
Unpick all the seams of the cuff.
Each cuff has two sides, so you should end up with four pieces of pleather.
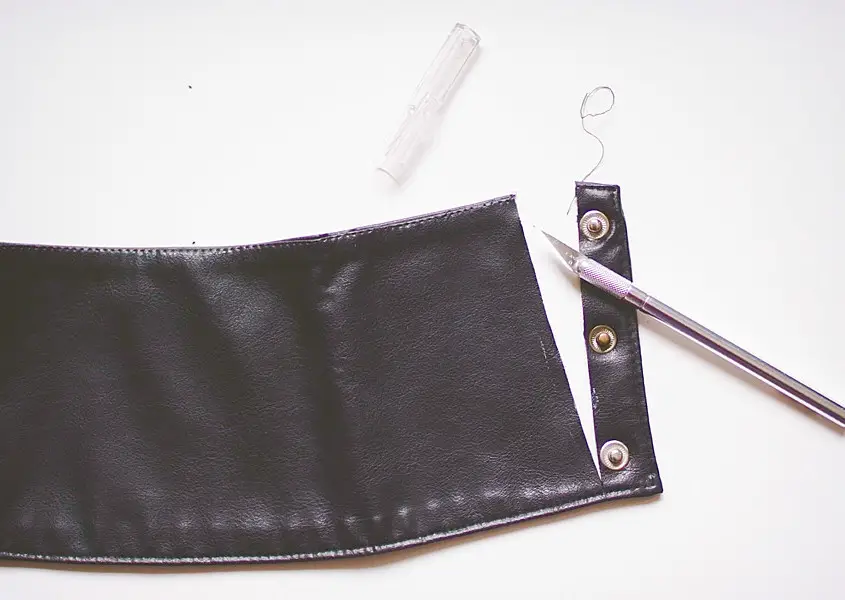
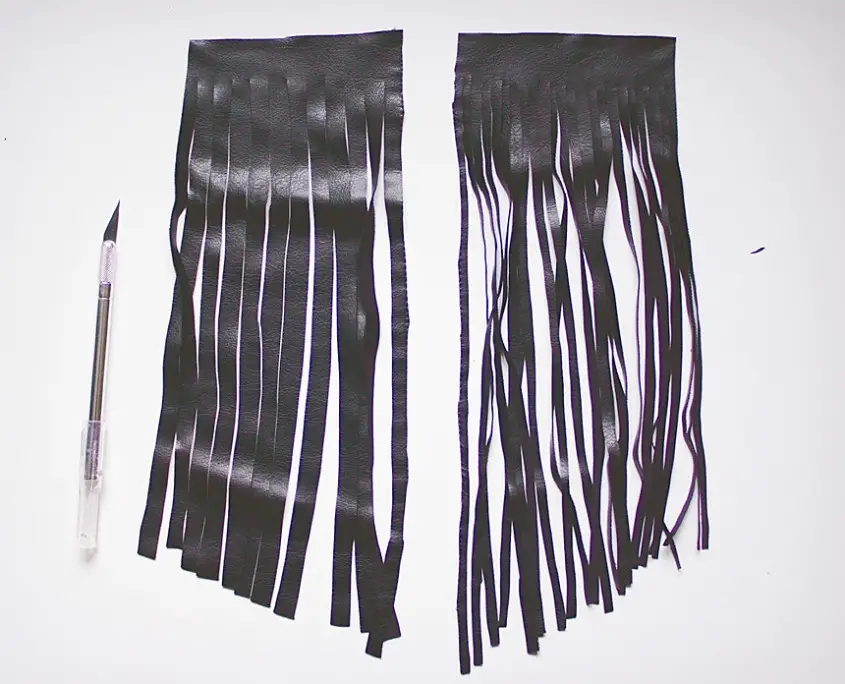
As you can see, some of the pieces (the ones that belonged to the outer side of the cuffs) look less wrinkled that the ones from the inner side, so we will use them for the top layer of the fringe. The fringe made of the inner ones will run underneath the top layer.
Cut off the seam allowances.
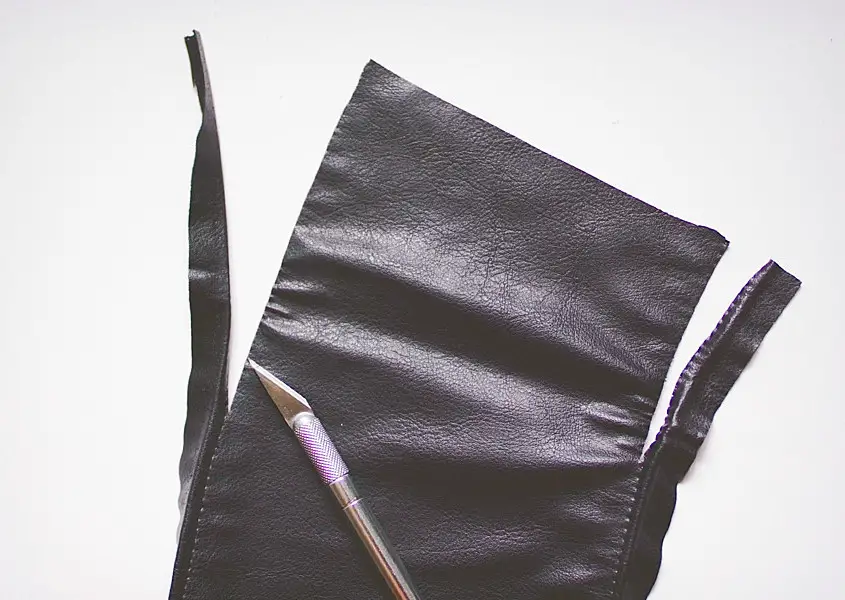
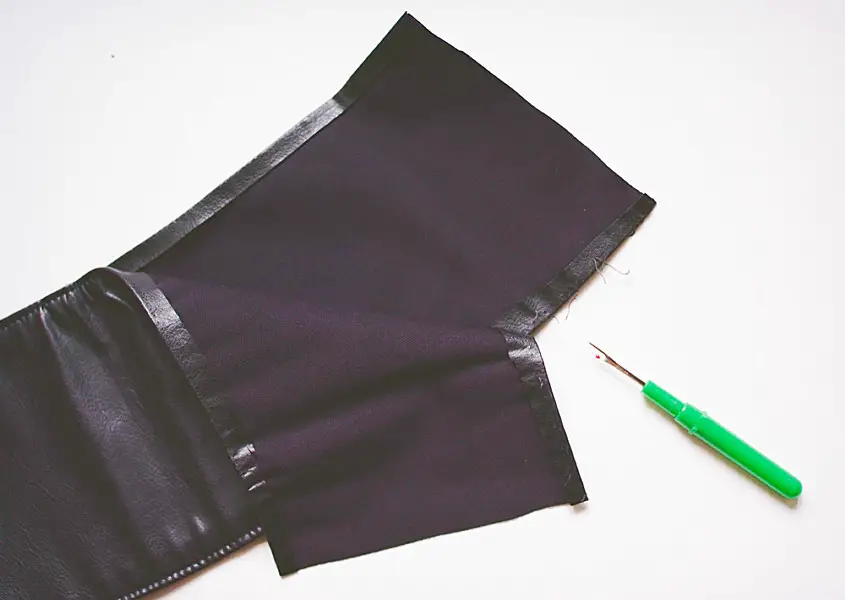
The shape of the pieces is not rectangular, and it poses a certain challenge since we do not want to have a curved fringe, do we? That’s what I thought, at least. However, in the end the shape made no difference. After the fringe was cut, its strings stretched a bit, and the curved shape became perfectly rectangular.
That’s how each piece will be attached to the shoulders. It seems to be a bit counter-intuitive, but this layout will give us a nice steeply slanted bottom line.
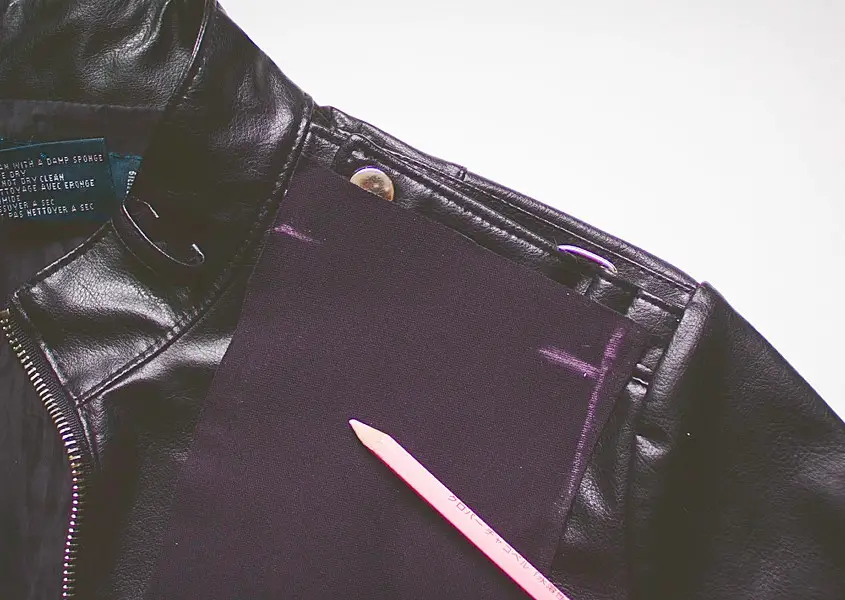
The piece is wider that the space available under the epaulette, so it needs to be cut.
Let’s flip it on the other side and mark the borders. The horizontal lines show where the fringe will end.
Now take the ruler and mark the fringe lines. I made the fringe stripes 3/4” (about 1.9 cm). I marked the stripes on the top, on the bottom and in the middle to use the marks as a guidance while cutting.
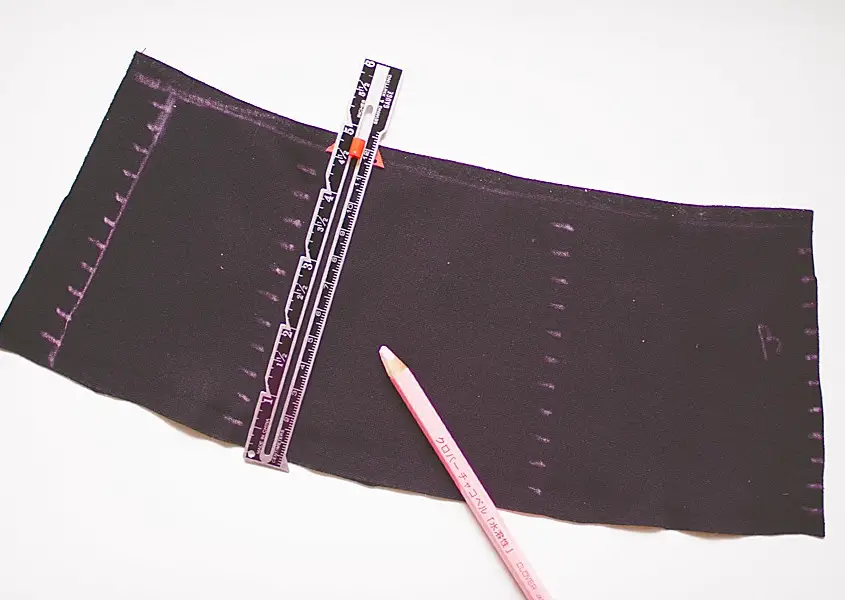
Lookin’ good! Small imperfections will be unnoticeable in the end.
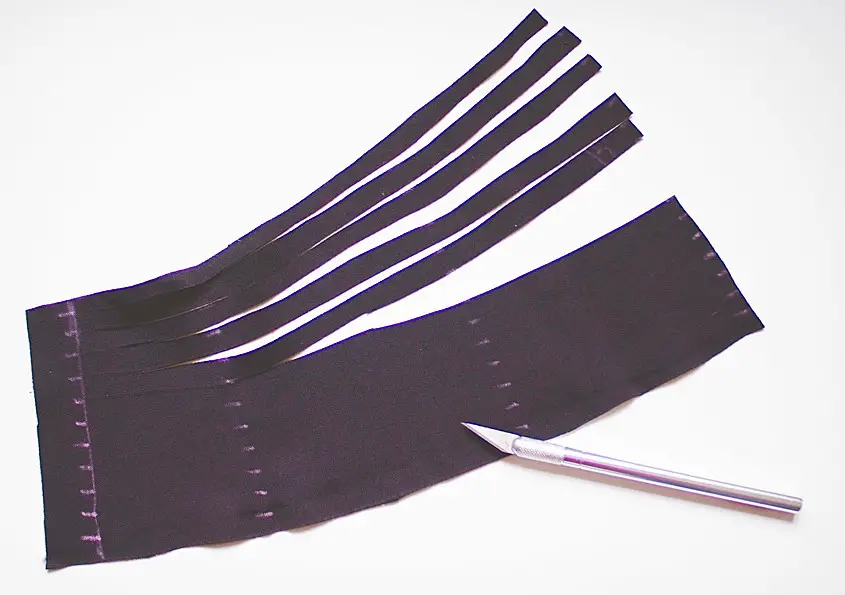
However, later I decided that the stripes were too wide, so I cut them in two.
Repeat the same steps for all 4 pieces.
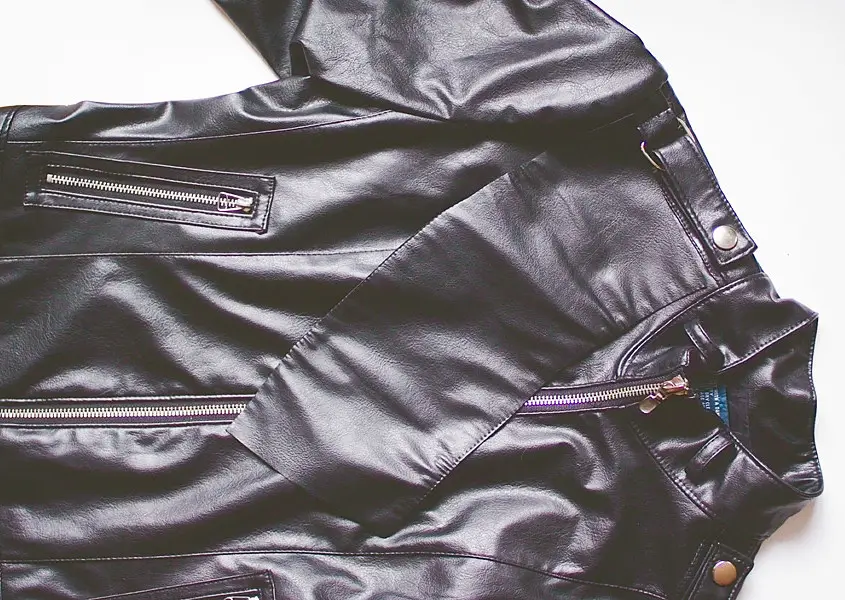
Now it is the time to attach the fringes to the shoulder under the shoulder straps.
I stitched it, but in fact I should have used leather glue. But as I said at the moment of doing the DIY I did not have any; once I buy it I will glue the fringe.
So, first attach the bottom fringe (the one which is made of the inner sides of the cuffs and thus is more wrinkled) right next to the should plank seam in the front.
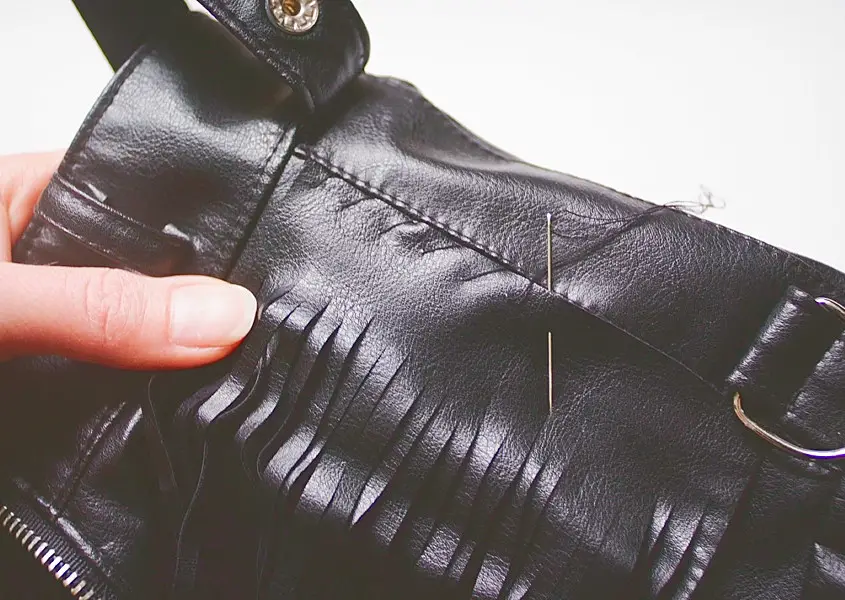
After you are done with the bottom fringe, attach the top fringe to the middle of the shoulder plank.
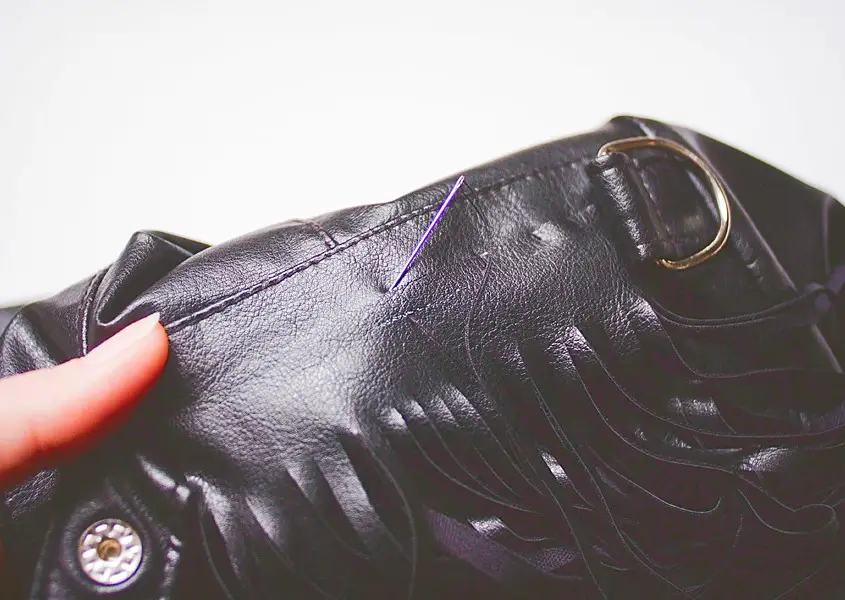
Do the same with two other pieces of the fringe and the second shoulder.
And that’s it!
How About the Sleeves?
Oh right, but what about the sleeves?! The cuffs were removed, so do we have to do anything with the sleeves? As a matter of fact – nope. We shall keep the sleeves the way they are! As you can see the lining and the shell are already stitched together. As of the frayed edge… well, since this is yet another Spring 2015 trend (which I will show you very soon!), so we can keep it as is!
Happy DIY-ing!
Disclaimer: Yup, this post may contain affiliate links! If you buy something from me, I get some margarita money (not enough to buy a pair of shoes). Read more here.


Lida Eisenbruk thanks you so much Lida 🙂
Lida Eisenbruk thanks you so much Lida 🙂
I love it Nadya
I love it Nadya
Mary Montserrat-Howlett thanks, Mary 🙂 Very glad you liked it 🙂 though the post itself is less funny 🙂
Mary Montserrat-Howlett thanks, Mary 🙂 Very glad you liked it 🙂 though the post itself is less funny 🙂
Isabelle Merci, Isa 🙂
Isabelle Merci, Isa 🙂
Ahaha! I love the title! Going to check it out now!
Ahaha! I love the title! Going to check it out now!
HOLY COW!!! you just blow my mind away! That is such a great Idea!! I love how you took the sleeve ends and turn it into the fringe therefore they ave a slight angle. I just LOVE it Nadya! Great job HUGS
http://lauest.com
Fernanyi, thanks hehe 🙂 So glad you liked it 🙂
So clever!
Koko, thanks for stopping by! glad you liked it 🙂
Great job!!! This tutorial has inspired me!! I just purchased a oversized blazer from Goodwill and I can’t wait to turn it into a tuxedo dress!!
-pinkcoatedlifestyle.com
Kenisha, thanks for your kind words 🙂 I am happy you got inspired and I wish you good luck with your upcycling project! Hope you will share it with us in your blog 🙂
Beautiful!
Beautiful!